Drain Care New York

Instructions for Drain Care
A drain is a tube that prevents body fluid from collecting at your surgical site. The drainage end of the tubing is placed into your surgical site through an opening near your incision, and is held in place by a stitch. The drain pulls this fluid (by suction) into a bulb. You can then empty the bulb and measure the fluid inside. Record the fluid amounts on a “Drain Log.”

Steps to empty, measure and record drainage:
- Wash your hands thoroughly before emptying the drains.
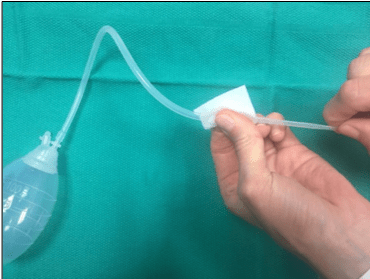
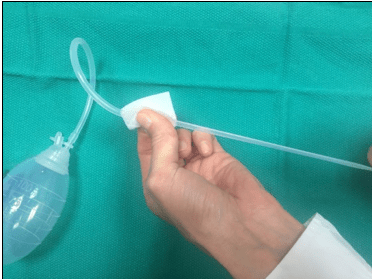
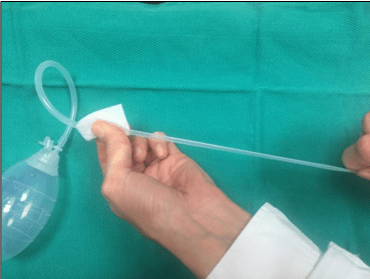
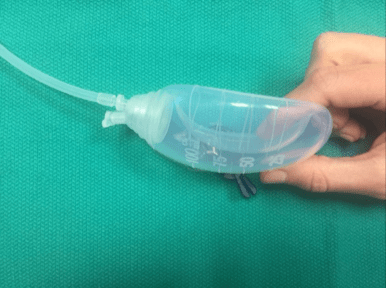
- While the bulb is squeezed flat, “strip” the tubing with an alcohol swab or wet paper towel as shown below. This will help get all of the liquid into the bulb and move clots through the tubing to keep the drainage flowing. Pinch the tubing close to where it enters your skin in order to prevent tugging, which can be painful. Strip the tubing 2 or 3 times before you empty the drain.
- Pull the plug out of the bulb to release suction.
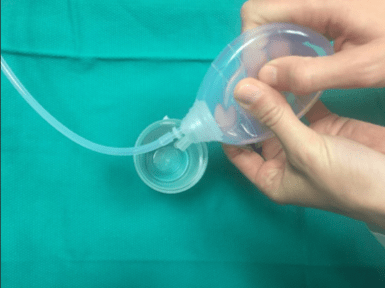
- Turn the bulb upside down and gently squeeze it to empty the fluid into a measuring cup as shown below. Clean the plug with alcohol. Then squeeze the bulb tightly until completely compressed and flat. While the bulb is flat, put the plug back into the bulb.

- The bulb should stay flat after it is plugged. This way the gentle and constant vacuum suction can restart.
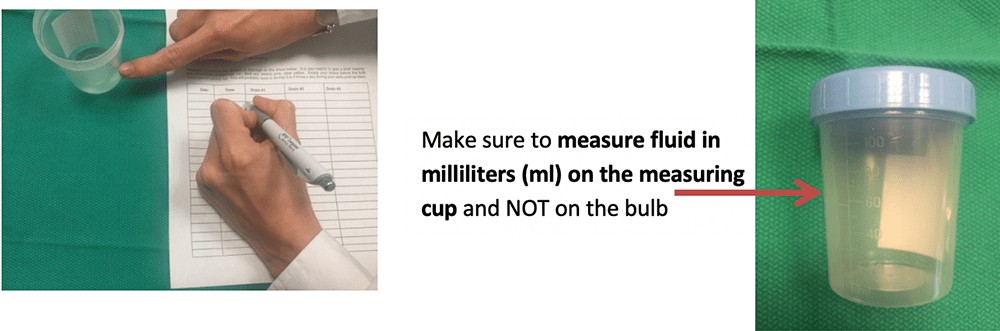
- Measure the amount of fluid you collected in milliliters (ml). Write the amount of drainage and the color as well as the date and time you collected it as shown below. Record these on the attached “Drain Log.”
- Flush the fluid down the toilet.
- Wash your hands.
- Keep your insertion site clean and dry by washing it with soap and water and patting it dry.
Troubleshooting Drain Problems
My drain bulb will not hold suction
If your drain does not stay flat when fully compressed with the plug correctly in place, it will not provide the amount of suction needed to remove the fluid away from your surgical site. If this happens, try to strip the drain tubing several times and try compressing the bulb again. If the bulb continues to not stay flat, let your provider know.
My drain site is leaking fluid
Sometimes fluid leaks from around the drain site. This can wet your gauze dressing or your clothing. If this happens, remove any wet dressings and use soap and water to clean the area. Make sure that the bulb drain is secured and “flat” for the suction needed.
I see blood clots or solid debris in the drain tubing/bulb
It is common for small debris or a blood clot to be found inside the tubing or bulb. The blood clot appears as a dark, stringy lining. It could prevent the drainage from flowing through the tube. Try to strip the drain to move the clot into the bulb. If drainage is completely blocked from getting into the bulb, let your provider know.
My skin where the drain enters is red and tender
The drain tubing can irritate the skin at the drain entrance site. This is normal and will go away once the drain is removed. You can apply bacitracin ointment to the drain site once daily. You can also use gauze to create a “pillow” around the drain site. Also, holding the tubing to your skin with an additional band-aid can help secure the drain better. This can help reduce irritation.

Call the office immediately if you have any of the following signs or symptoms:
- Sudden swelling, redness, warmth, bleeding, and/or foul drainage from your incision or drain site.
- Sudden increased pain that cannot be relieved by prescribed pain medication.
- Fever of 101°F (38°C) or higher.
- Persistent nausea and/or vomiting.
- Calf pain or tenderness.
- Shortness of breath.